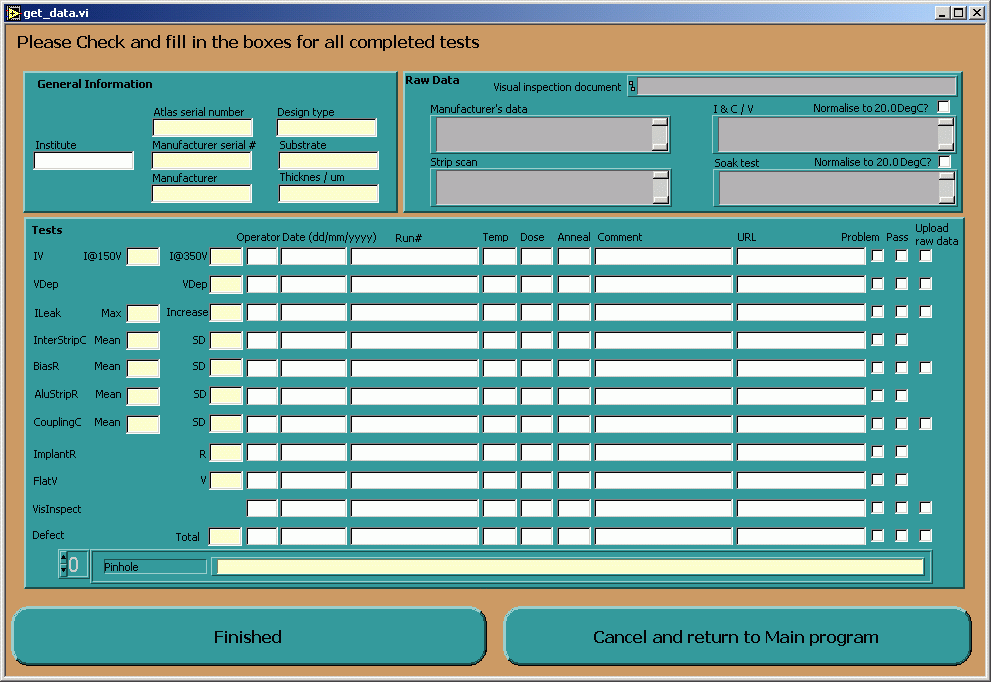
The process is started by selecting the Upload to SCTDB action while running DataRead.vi. Firstly the popup dialog get_data.vi is displayed.
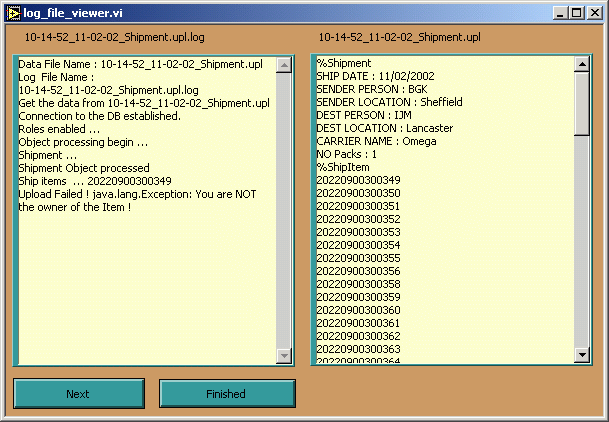
This allows the user to enter any tests such as interstrip capacitance which are not entered automaticaly. It also allows the user to edit any value previously entered. Any alterations made during a previous paper output will be retained. The user must check the Pass, Problem and Upload raw data boxes where appropriate, it is hoped that this will be automated at a later date.If Visual_template.doc has been used to create the visual inpection file the contents of the text file created at the same time will appear in the visual inpection comment section. The Normalise to XXX DegC checkboxes chose between the relevant normalised or raw data. To save space the strip defects are in the form of an array, cycle through the elments to edit them seperately. The number of defects are automatically calculated. Click the Finished button when ready to continue or the Cancel and return to Main program button to cancel the Upload to SCTDB operation. If the former option is selected then a set of database compatible files are written out and an attempt is made to upload them. Files that fail to upload cause a log file to be written, these are displayed interactively by log_file_viewer.vi.
Click the Next button to view the log files in sequence. Click the Finished button to dismiss the dialog.