|
|
|
Here is a list of astronomical observing projects
that you can do yourself, either with the naked eye or with the aid of
a decent pair of binoculars. The module numbers indicate which of the
taught courses is relevant to each project. If you do one of these
projects and write it up carefully, as you would a lab assignment, you
may be able to claim extra lab credit: take your completed write-up to
Dr Littlefair or Dr Cartwright for assessment.
list of projects
naked eye projects
Note: for most of these projects you need to be dark-adapted: spend 10
minutes or so in the dark (either outside or in an unlit room) before
starting to observe. Red light does not destroy dark adaption, so use
a red torch (tape a piece of red cellophane over an ordinary torch!)
to do your drawings.
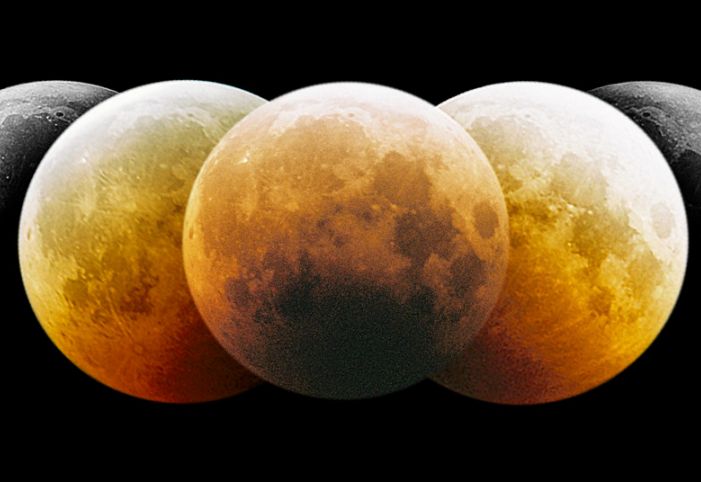
- The Phases of the Moon (PHY115/106)
- Observe the Moon as many times as possible during a lunar month,
and make careful drawings of the shape of
the illuminated portion, trying to ensure that you get the thickness
of the crescent quantitatively correct. Work out the geometry of the
Earth/Sun/Moon triangle and try to use this to
draw a diagram showing the Moon's position in its orbit for each of
your observations.
- The Magnitude Limit (PHY104)
- The Hellenistic Greek astronomer Hipparchos constructed a star
catalogue which classified stars in six brightness levels or
'magnitudes' — the origin of the system we still use today. In
principle, therefore, the typical naked eye can detect stars down to
the sixth magnitude. However, street lighting was not widespread in
the second century BC, and Hipparchos' skies were therefore much
darker (and probably less polluted) than a typical night sky today.
What is the apparent magnitude of the faintest star that you
can see?
There are two methods of determining
this number. They count as separate exercises.
- Method 1: Star Charts
- Locate the star Aldebaran (alpha Tauri). One way to do this is
to find Orion and look for the first really bright star to the
northwest of Orion: it's about as far from the northwest corner star
of Orion as that star is from the southeast corner star. Aldebaran
is one apex of a fairly conspicuous triangular group of stars
forming part of the constellation Taurus (the Bull). Draw this
triangular group, including all the stars you can see – the drawing
should be as nearly accurate and to scale as you can make it. Then
use a planetarium program to draw the same area of sky, showing
stars down to magnitude +6.0 with the magnitudes shown on the plot
(a simple program which does this is the online star-chart utility
Your Sky by John
Walker). Identify the stars that are shown on your drawing: your
limiting magnitude is somewhere between the magnitude of the
faintest stars you saw and the brightest ones you didn't see (for
example, if you saw a star of magnitude 4.2, but failed to see one
of magnitude 4.6, your limiting magnitude is 4.4 plus or minus 0.2).
We choose the region round Aldebaran because it includes stars
covering a useful range of magnitudes between 3.6 and 6.0; you might
also try the bottom half of Orion itself.
- Method 2: Star Counts
- Obtain a hollow tube — an old bog roll or kitchen towel roll
will do nicely — and measure its length, L, and the radius of the
hole, R. Point the tube in a random direction (avoiding street
lights!) and count the number of stars you see through it. Repeat
at least a dozen times - the more the better - and calculate the
average number n of stars seen through the tube. The solid angle
subtended by the tube aperture is πr2 where r = R/L,
the radius of the tube divided by its length. The solid angle of
the whole sky is 4π, so the total number of stars in the whole sky
that would be visible to you is N = 4n/r2. A lab
demonstrator will supply you with a table showing the number of
stars brighter than apparent magnitude m, for values of m between 1
and 9: use this to make a plot of log N against m and hence read off
your limiting magnitude.
- The Light Curve of Algol (PHY104)
- Algol (beta Persei) is the classic eclipsing binary, with a deep
eclipse every 69 hours as its hot class B primary passes almost
directly behind its cool class G subgiant secondary. The eclipse is
easily visible with the naked eye.
Use the online calculator in this
Sky and Telescope article to find the times of the next few minima.
Check with a planetarium program like Your Sky that Algol is
going to be visible from Sheffield on the relevant dates. The eclipse
lasts about 10 hours from start to finish, so even eclipses that reach
their minimum during daylight may be worth observing to detect the
changing brightness as the primary star comes out from behind the
secondary. Use nearby stars of comparable brightness as references
for your brightness measurement: gamma Andromedae, west of Algol, is
about the same brightness as Algol usually is (magnitude 2.1), epsilon
Persei, east of Algol, is magnitude 2.9, and rho Persei just south of
Algol is about as bright as Algol at absolute minimum (magnitude
3.4). If weather permits, try to obtain the whole eclipse light curve
by observing several eclipses at different stages.
This article
gives detailed advice
on how to construct the light curve, either visually or photographically.
-
The Position of Sunset (or Sunrise) (PHY115)
- Find an observing location with a reasonably clear view of the
western (or eastern) horizon. A horizon with some helpful landmarks
that you can locate on a map would be useful. Over a period of
several weeks, note the time and the position of the Sun on the
horizon as it sets (or rises). If you have a camera, take photographs;
otherwise, make careful drawings. A
reference photograph series or panoramic drawing showing the whole of
your horizon with its landmarks is a good idea.
Use a compass, or a detailed map showing your landmarks, to
calibrate your horizon so that you can work out the absolute
directions corresponding to each of your sunsets (or sunrises). Make
a plot of direction against date, and also a plot of sunset time
against date. Compare your observations with
calculations of the sunset/sunrise time (use the Astronomical Almanac
or a planetarium program to find the RA and declination of the Sun on
the relevant dates).
Note that it is, at least in my experience, very difficult to hold
binoculars steady when looking at stars. You will almost certainly
want to stabilise them somehow: use a tripod if you have one, lean
your elbows on a handy fence, lie back in a deckchair or lounger — use
your ingenuity!
- The Galilean satellites of Jupiter (PHY104/106)
- The four Galilean satellites of Jupiter are fairly easy to see
with decent binoculars (I can do it with my little 10x24s, despite
less than perfect eyesight, and my big 12x50s show them very clearly).
Draw sketches of the Jovian system, showing all the moons that you can
see (one or more may be invisible against or behind Jupiter itself),
with the distances and orientations as nearly to scale as
possible. Record the relative brightnesses of the four moons. (You may
see more than four small objects close to Jupiter, in which case the
extra ones will be background stars — don't worry about these, as
Jupiter's motion will ensure that a star which is close to Jupiter on
one night will be out of the field of view in subsequent
observations.) Repeat the observations as many times as practicable
over the course of a couple of weeks. Then redraw your diagrams in
the form of a graph of moon position against time, similar to the
sinusoidal plots found in, for example, Sky and Telescope magazine.
See if you can work out which
moon is which on the basis of your series of diagrams. If you can't,
try comparing your drawings with images from TheSky or a similar
planetarium program.
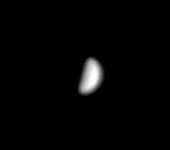
- The Phases of Venus (PHY106)
- One of Galileo's other great discoveries was that Venus shows
phases like the Moon. This helped to demonstrate that the
Earth-centred solar system of Ptolemy was inferior to the Sun-centred
model of Copernicus (and Aristarchos of Samos). It should be possible
to see these phases using a good pair of binoculars: alternatively,
this project can be done using a telescope.
Observe Venus several times over a period of several weeks (the
orbital period of Venus is 224 days, but a couple of months is long
enough to see a real change). Draw the image of Venus, paying
attention to shape, size and orientation. How does the size of the
image change as the phase changes, and why? Use trigonometry to work
out the distance of Venus at each of your observations.
To give you an idea of what you might see, here is an animation of telescopic images
of Venus made by students at Calvin
Observatory (probably using a 16-inch telescope, although this is
not quite clear from the website).
- Mapping the Moon (PHY106)
- On a night with full or nearly full Moon, make a careful drawing
of the Moon's surface features. Include as much detail as you can.
(Note: if you are interested in
photography, you can also try doing this practical by taking a
photograph of the Moon either with a conventional camera (you'll need
a long lens, and very fast film) or with a digital camera using a
combination of optical and digital zoom.) Compare with a map of
the Moon and identify the features you have drawn. How accurate were
you? What is your resolution (i.e. how big are the smallest features
you could consistently draw)?
Repeat this procedure at least twice, and look for variations in
the positions of the features, caused by slight changes in the
orientation of the Moon.
- Deep Sky Objects (PHY104)
- How far can you see with binoculars? Ben Crowell's Binosky
is a catalogue of interesting deep-sky objects to look for. In each
case, make a careful drawing, and describe the visual appearance of
the object in your log. Include colour information if you detect any
colours. If you are viewing an open cluster, count the number of
bright stars.
Binary stars are also good binocular objects. Luis Arguelles has a
list
of binocular doubles, in many cases with comments from observers.
You should draw the configuration of the pair and note any colour that
you see.
|
Hicks Building, Hounsfield Road, Sheffield S3 7RH, UK
|
